Adventures in Self-Watering Planters (Part 1)
Well folks, I never could have guessed it, but I (apparently!) have opinions about plant planters and made a variation of a self-watering planter that fits into household glass jars.
Keep reading to learn how I made it or to make your own!
Whyyyyy
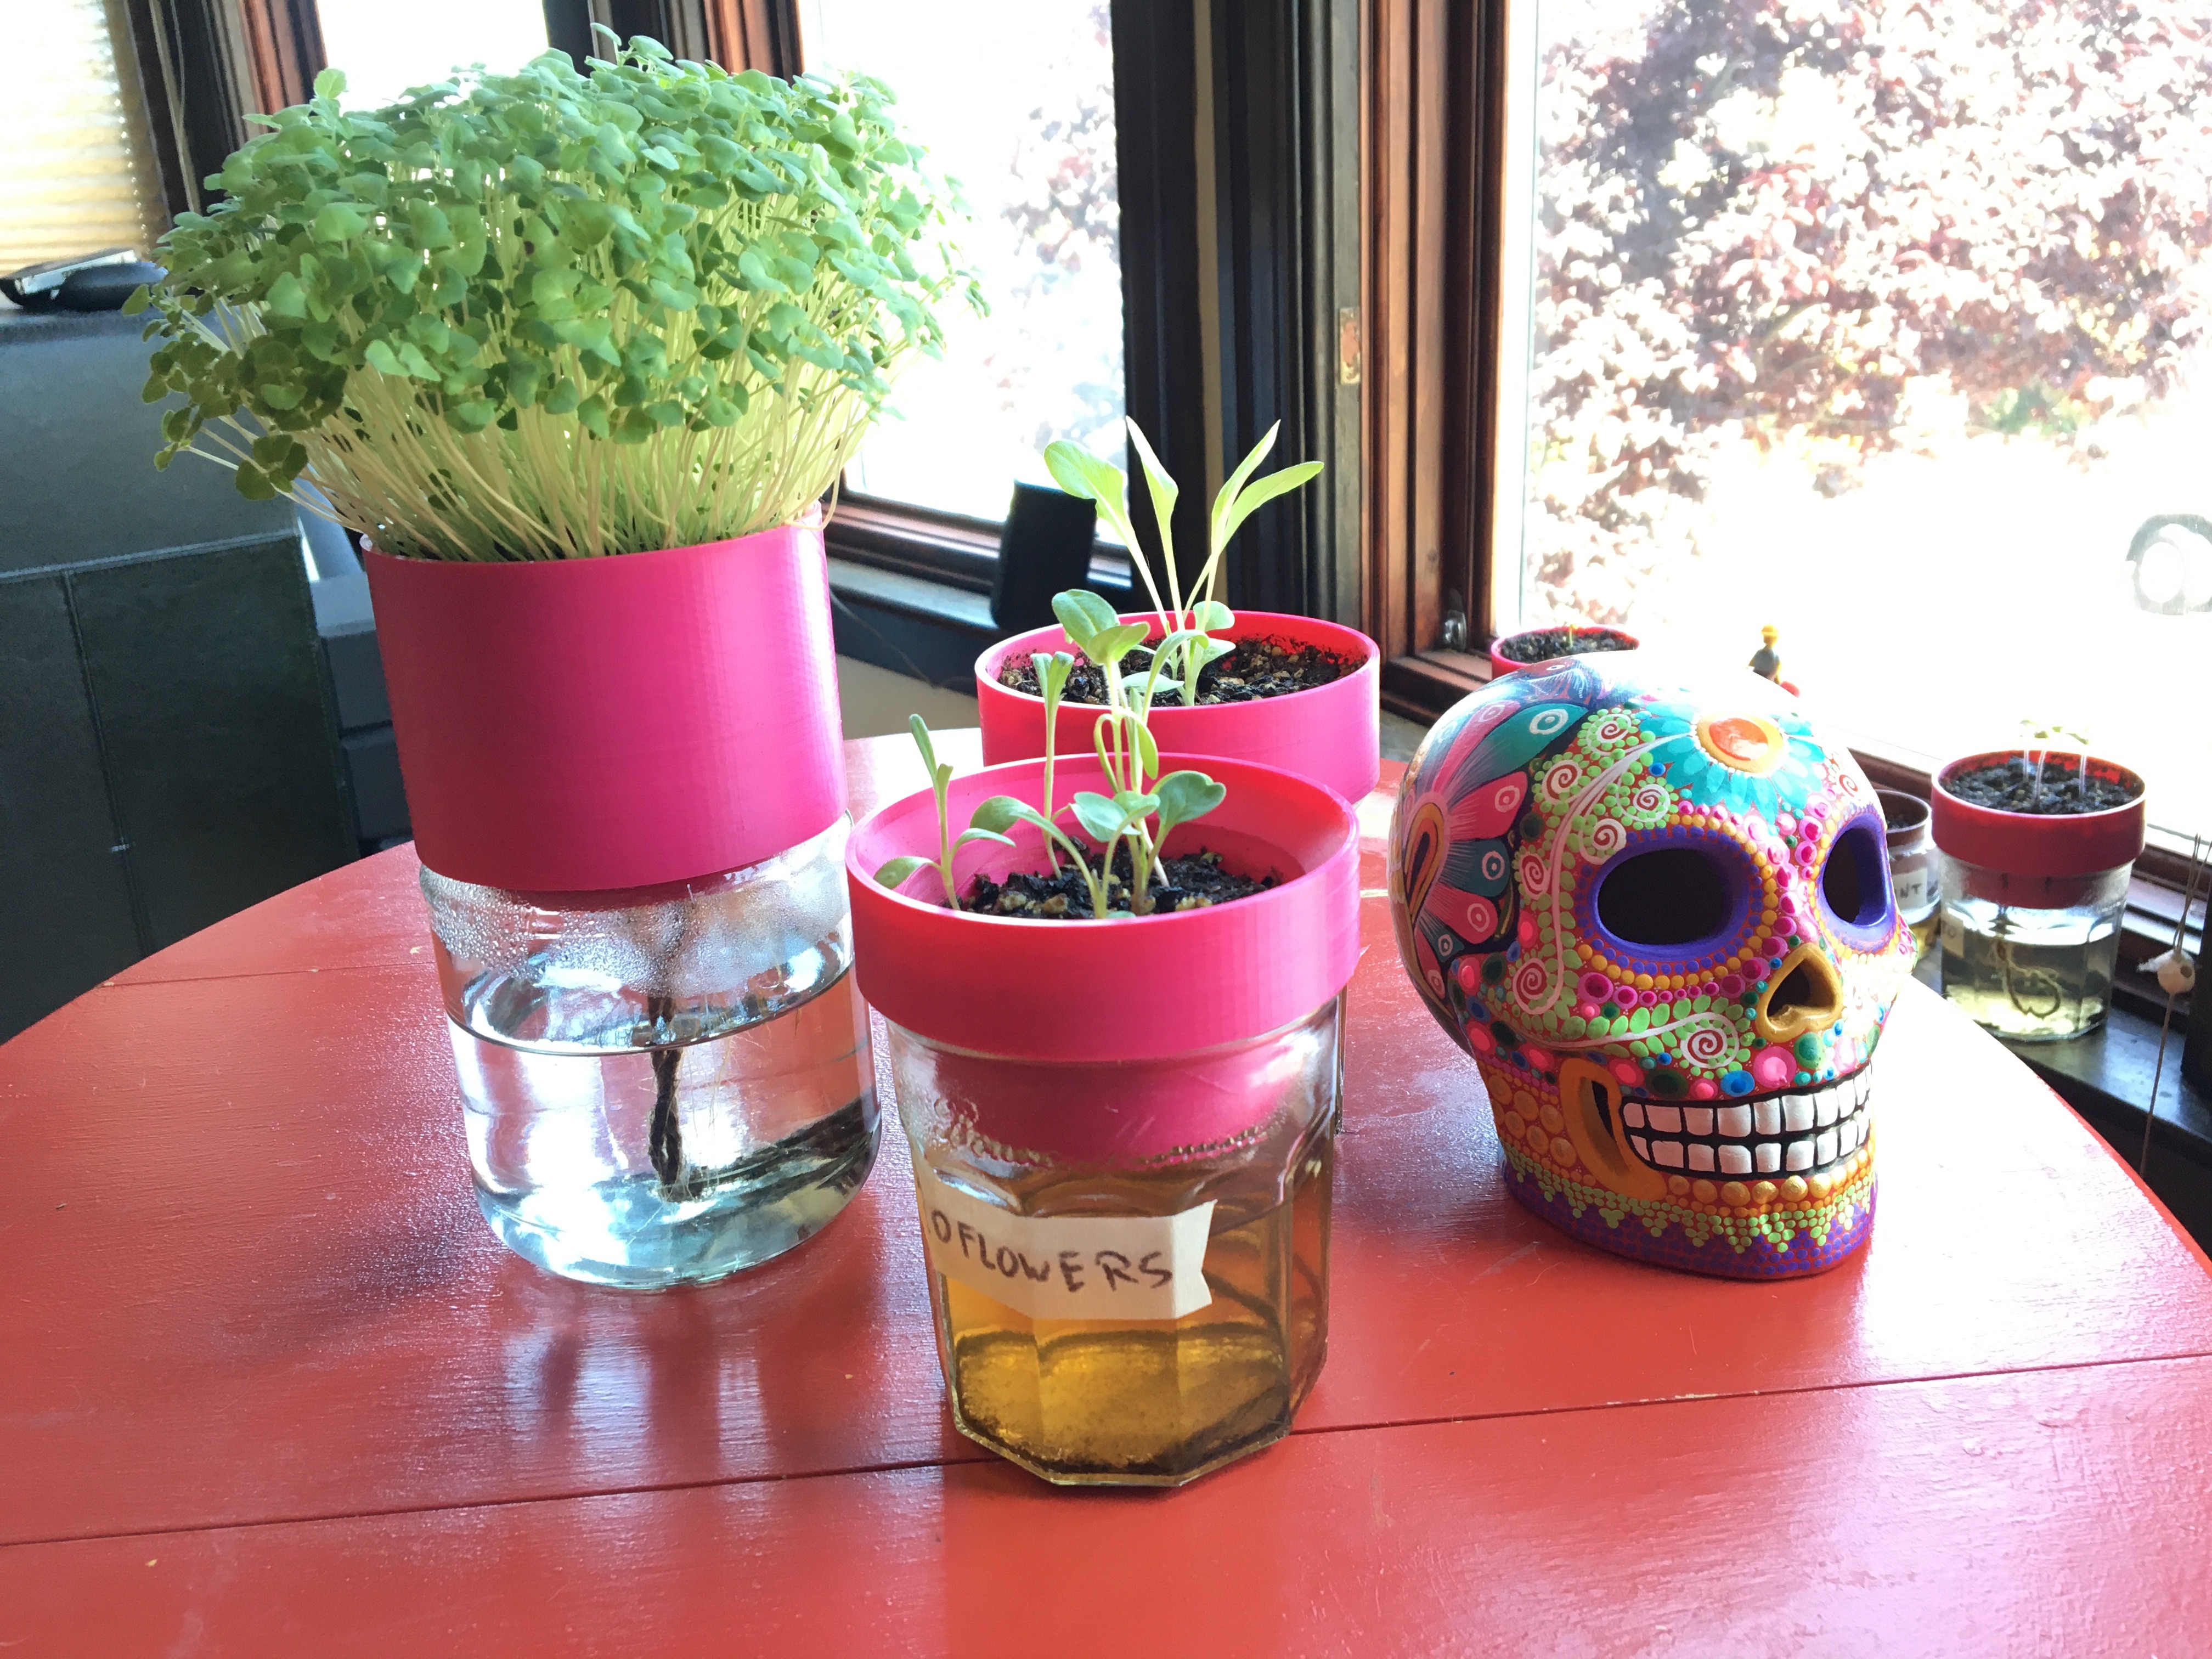
I’m not much of a green thumb, but I like plants. They make me feel good. When the world is scary and unknown, growing a cute little plant in a cute little planter is a very welcome distraction.
I also like low-maintenance, which is why I’m interested in self-watering planters. Unlike typical planters that take water at the top and drain at the bottom, self-watering planters keep a reservoir of water at the bottom and draw it up into the soil automatically as the soil dries out.
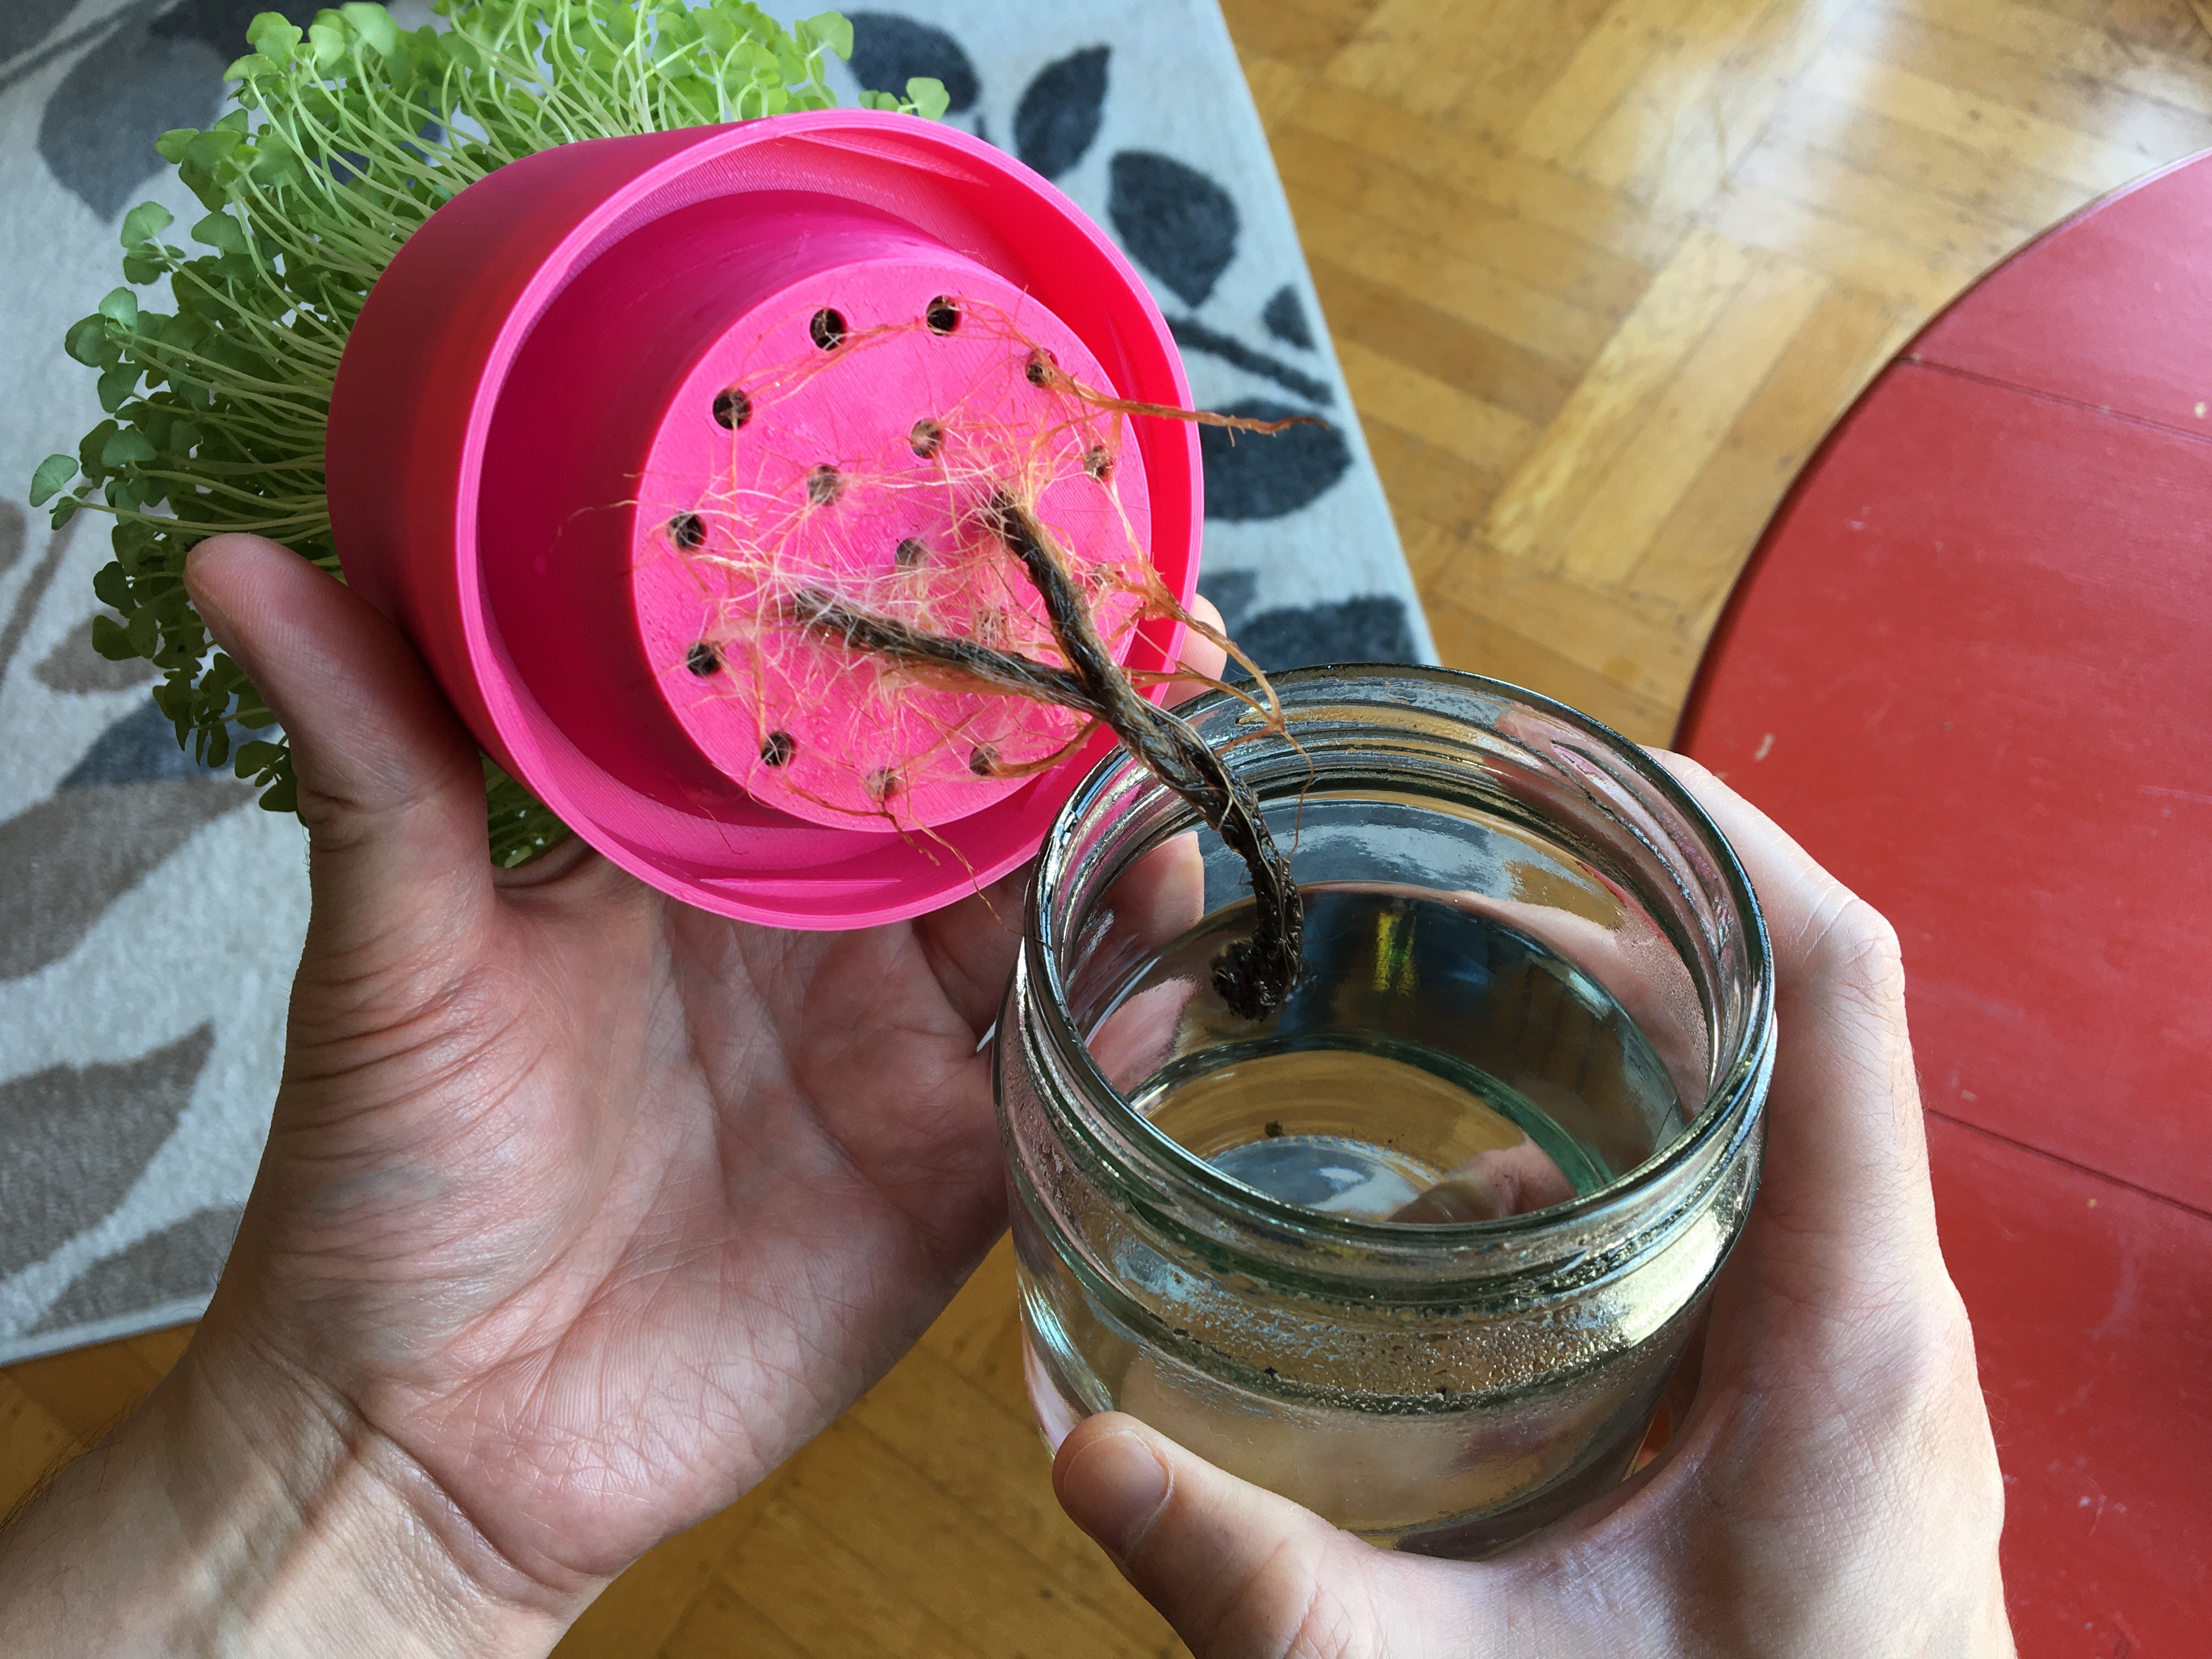
Notice the string in the water. It defies gravity and pulls water up via capillary action. Later, as the plant grows, its roots will extend into the water and help out too.
(You might be asking, if the plant’s so thirsty, why not submerge the whole thing in water? Because that will cause the soil to grow mold and the roots to rot, harming the plant!)
Why I made my own
There are two problems in a lot of the designs I’ve seen:
- The lower reservoir container is opaque and prevents easily seeing the water level, causing more regular checking and maintenance
- The reservoir is too small, requiring more refilling
Glass jars as reservoirs remedy both issues. They’re clear so it’s easy to gauge water level, and they come in sizes big enough to hold a lot of agua.
Nailing the Design
Reverse-Engineering a Jar Lid
Fortunately or unfortunately, my house is filled with jars that fit lids like this, so that's what my design uses:

Getting a good fit on a jar meant making a lid, from scratch. Luckily, for a simple part like this, it’s relatively straightforward:
- Measure
I broke out the digital calipers and measured everything that seemed crucial: inner diameter of lid, outer diameter of jar mouth, lid lug length/height (see more on the naming here in the appendix below) - Recreate minimum test
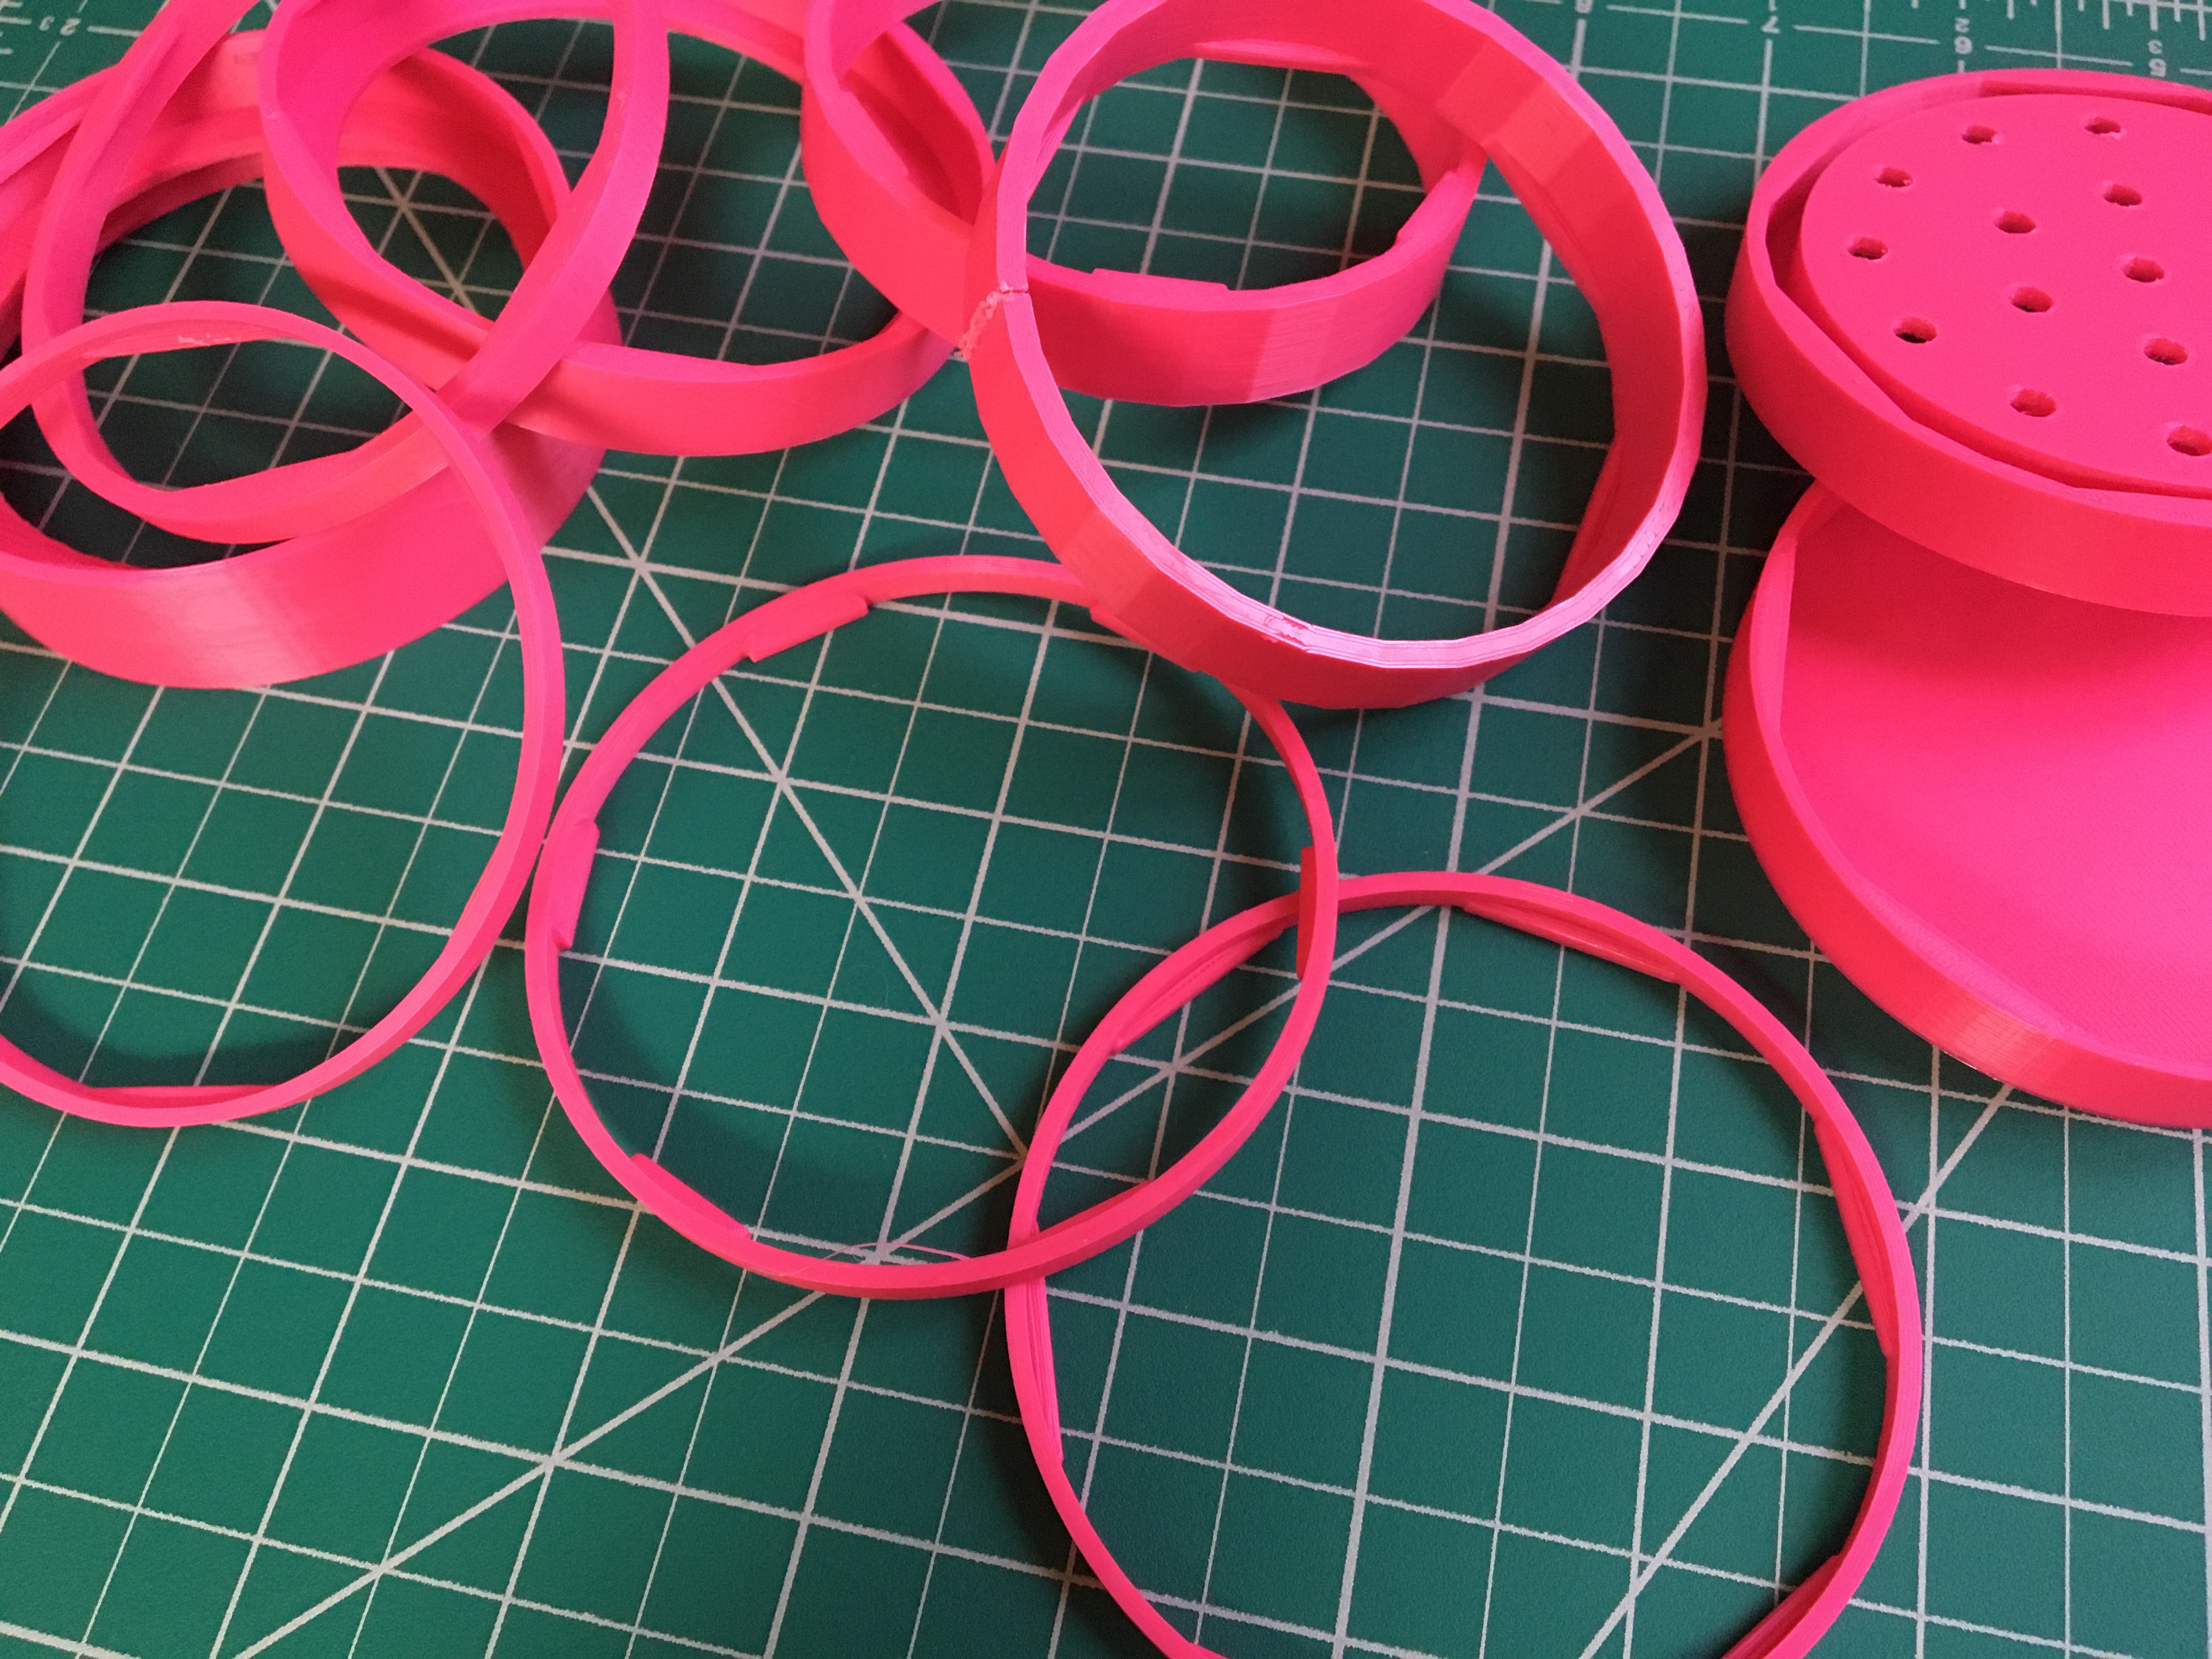
With those dimensions, I made a simple ring with six small lugs evenly distributed inside. I didn’t need to make the whole design yet, because I’m only testing the fit. Pro tip: the smaller the test, the tighter the feedback loop, and the faster you can iterate. - Repeat
First it was too tight, then it was too loose, then the lugs would jam up, etc, so I just kept updating the design until I got it right. The trick here is patience. (Good variable names and a log of the iterations and their outcomes helped too!)
What else does it need?
After the lid was fit and snug, I added other features, all of which are accessible as variables:
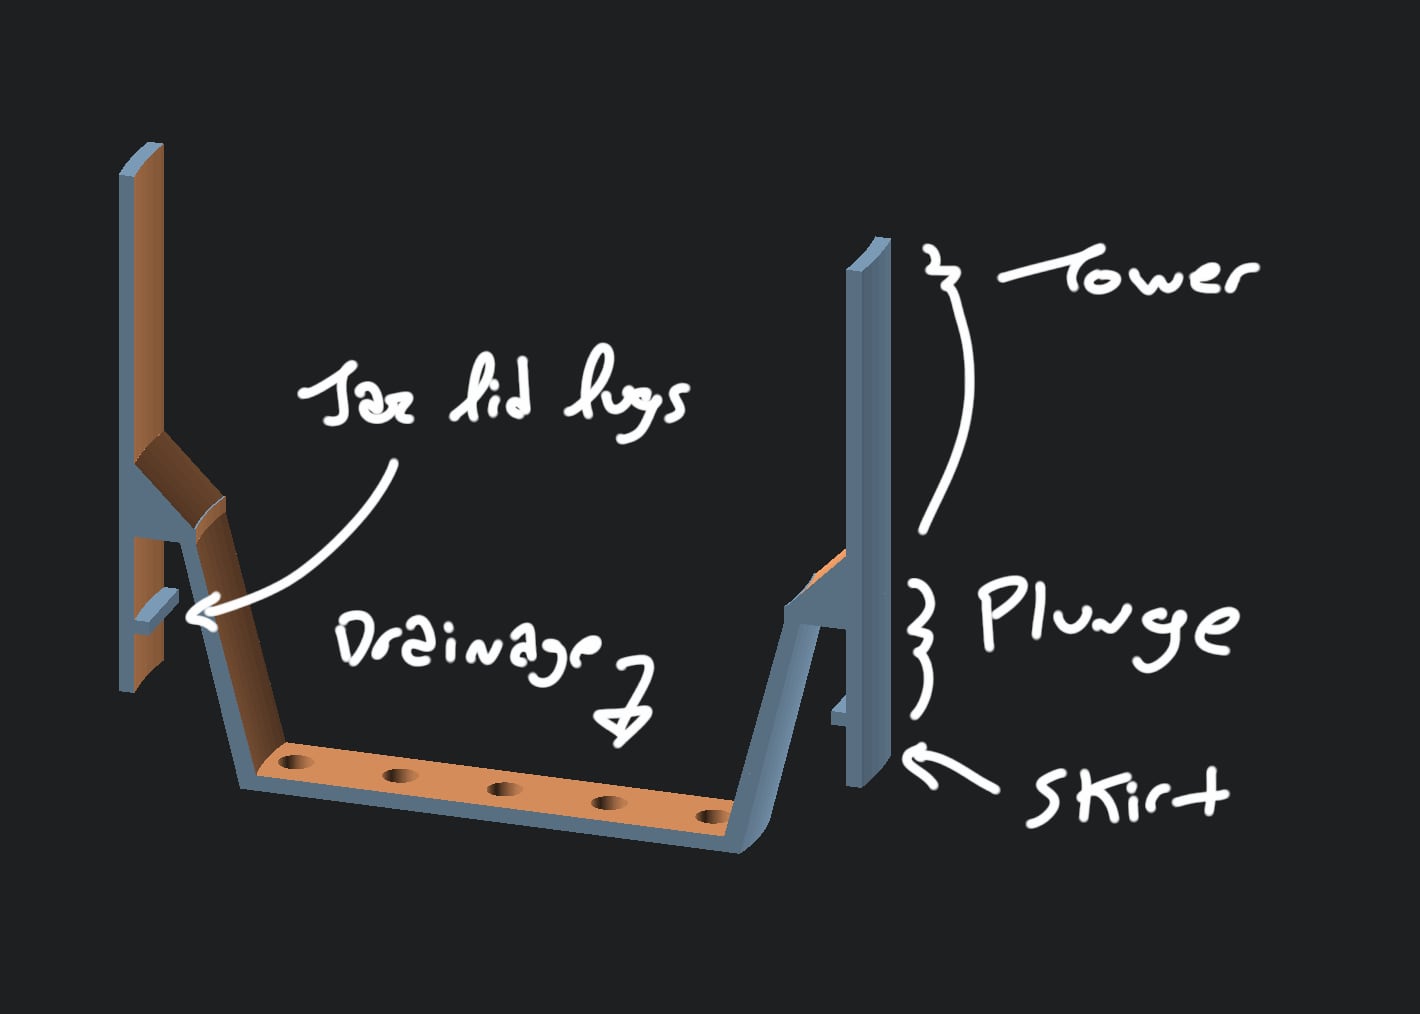
- Adjustable height pot
The pot’s height is variable and can tower over the jar and/or plunge into it - Drainage holes at bottom of pot
Holes at the bottom of the pot let water drain out and hold the capillary string in place. - Skirts at bottom
These are purely aesthetic walls that extend over the exposed jar threads for a flush, tidy look.
Design for Manufacturing
In a nutshell, Design For Manufacturing (or DFM) means making a product easy to be made. For 3D-printing, that mostly means eliminating supports: the non-model scaffolding that gets torn away after a print is done.
Here's how it gets 3D-printed:
- It’s upside down! Printing it rightside up would need supports all around the lid and skirt
- The lid lugs are just wide enough for its ends to rest on the rim
- The drainage holes use a sacrificial bridge
- The diameter differences between the outer tower and inner pot are transitioned with a 45 degree funnel
Next steps
Other stuff and followup ideas to think about:
- The filament I used is made out of corn and is technically compostable, so it very probably isn’t the best choice for something around water? Something for me to keep an eye on!
- Making it work with mason jars and their threads… or no threads at all and let it rest on top of any container!
- What does it need to be a plant hanger? Simplest version is quick holes for hooks to latch into, but it’d need to be strong enough to not break under the weight...
- Could multiple pots share one jar? Or vice versa?
- The taller the tower, the higher the center of balance. And the tower could be made to be much wider than the jar. Both require thinking about legs or other supports to make sure the thing doesn’t tip over.
- Terrariums?!
Make Your Own!
3D models are available on Thingiverse: https://www.thingiverse.com/thing:4276363.
OpenSCAD code: https://gist.github.com/rocktronica/9ee5183306b35a14765a4ea627cf7887
Appendix: Types of lids
I’ve learned that there are two styles of jar closures: “continuous thread” (abbreviated as “CT”) and “lug”. The easiest way to differentiate them is by their lids: CT lids have threads that directly match the threads on the mouth of the jar, and lug lids simply have a number of lugs or little ridges extending inwards from the bottom of the lid.
Unlike the lids, the respective jars themselves from these two types may be indistinguishable.
Anyway, it turns out that the technical name for the lid I made is “82 lug lid” and it is very common for the brands of jelly and salsa that we apparently go through a lot of in my house. :)