Quick Tip: Changing Colors on 3D Prints
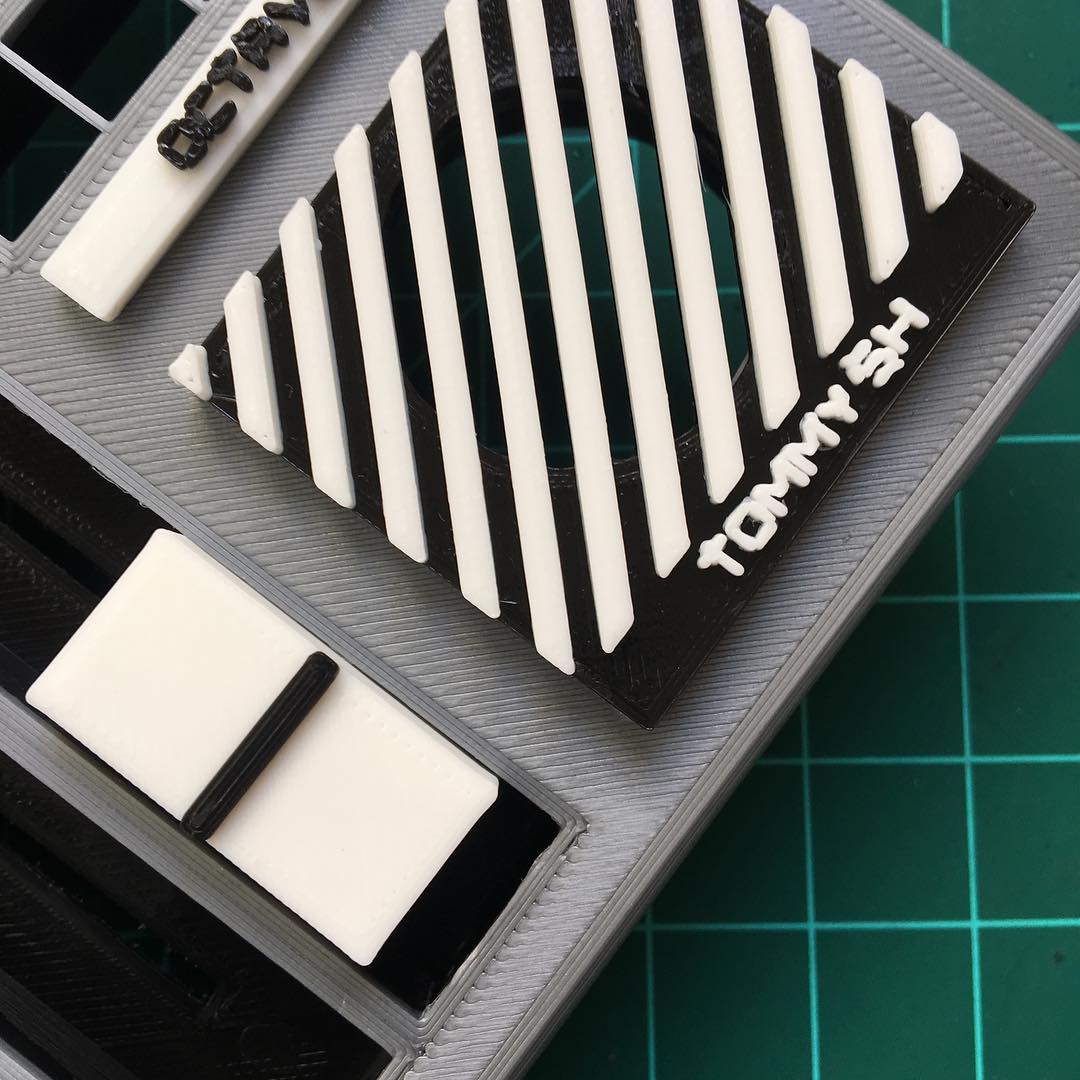
Changing filament in the middle of a print is an easy way to get multi-color effects without a multi-extruder 3D printer.
One way to do it is to sit by your machine and, when the moment is right, pause and change the spool.
Another way is programmatic. The process varies across printers and slicing software, but for my Prusa, I use their ColorPrint web app. With Slic3r's layers panel open as a reference, I just put the millimeter height into ColorPrint and it injects a "filament change" command into the G-code at that specific layer.
My first experiments with the technique mirrored the model's appearance; I put a filament change as soon as the next layer was supposed to be a new color. Seems logical!
Using some slider knobs as an example, that meant going from 13mm (white) to 13.2mm (black).
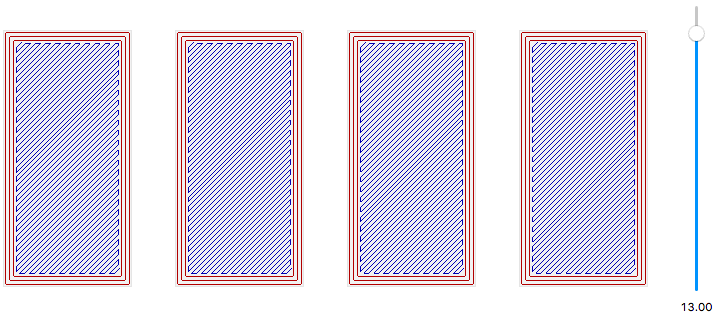
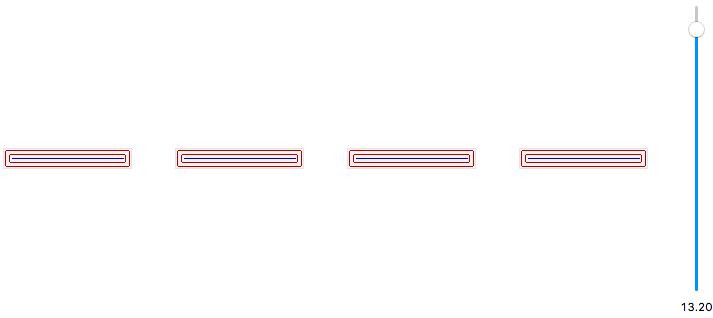
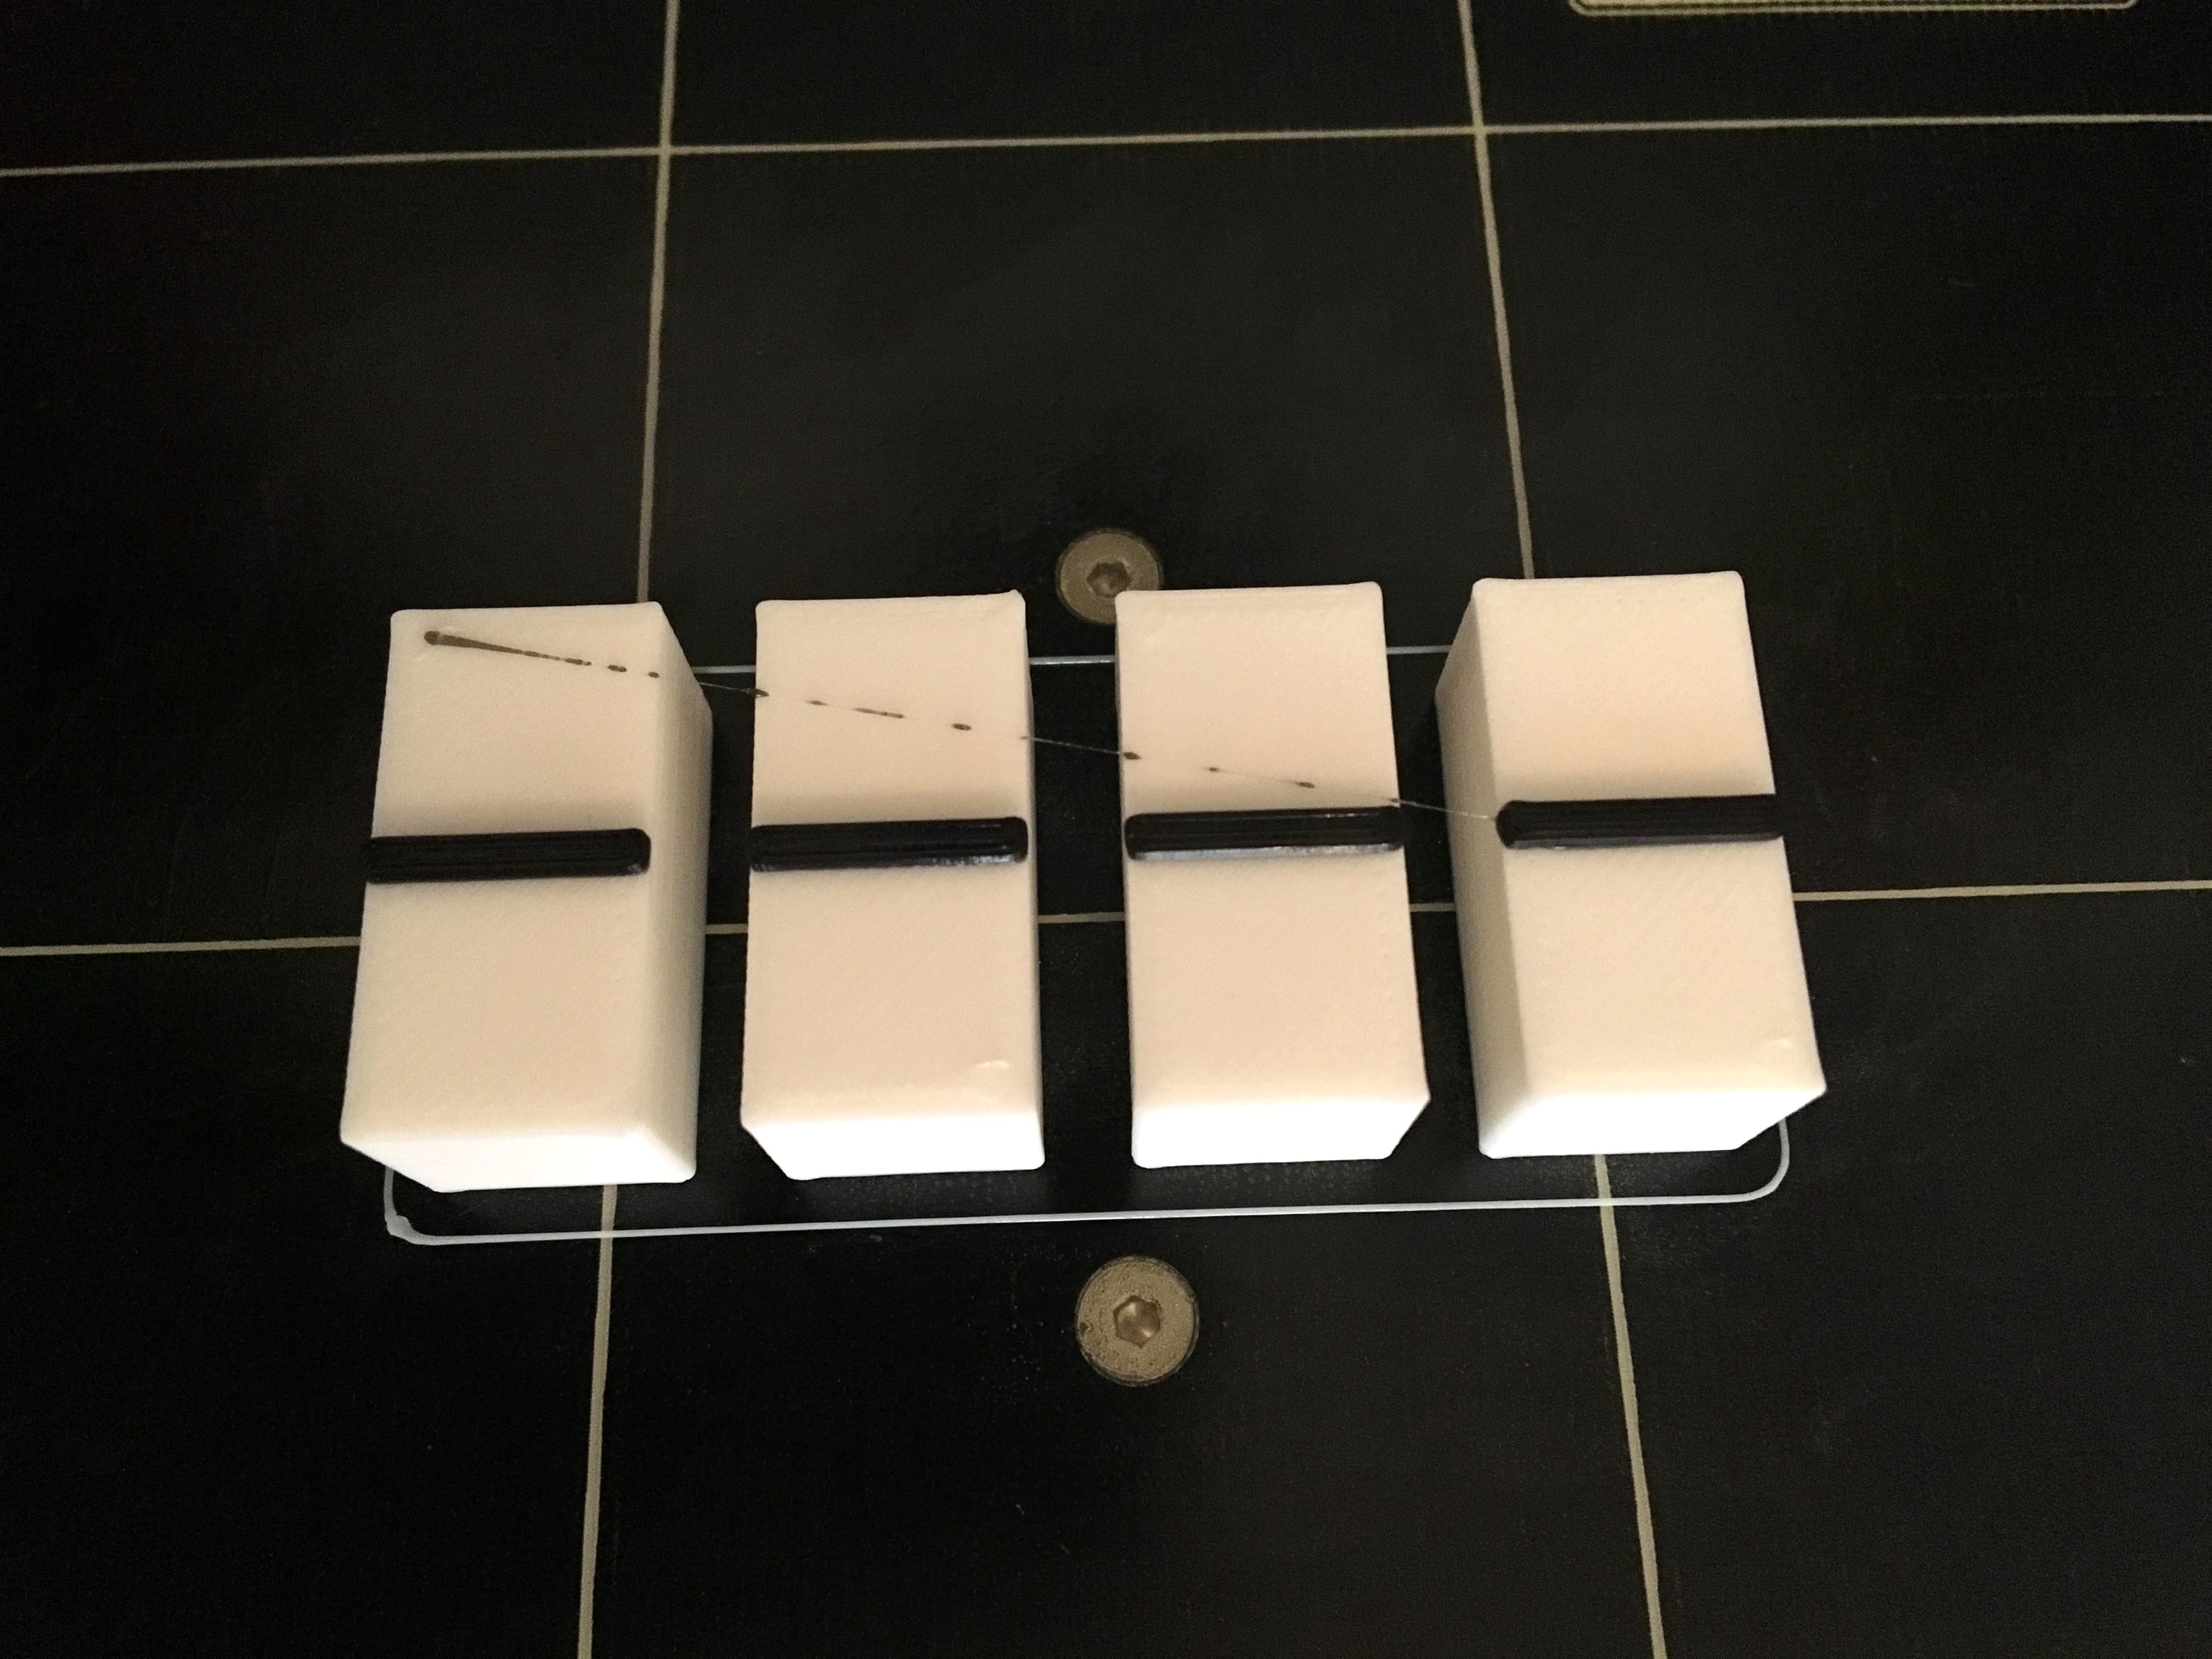
The printer complies but with an unfortunate side effect: after the filament is changed, the nozzle returns to its last extruding position and then moves wherever the new layer actually starts, leaving a trail of of accidental, oozed filament in its wake. This sticks to the previous layer and needs to be scraped or finished off, marring the surface.
The solution is to change the filament one layer after where you would otherwise want it.
The one layer of difference (.2mm, in my case) isn't aesthetically noticeable and is just enough vertical room to prevent plastic bonding from the odd positioning behavior. Any stringing is easily cut or melted away.
Admittedly, this is a workaround on what has got to be a bug in ColorPrint, but it's easy and works pretty well for me.
Happy filament-changing!